Sunday 25 September 2016

The Great war at Sea (September 2016)

Updated 7 January 2020

This was the last Update of these posts. It was unknown that the the main Boardgamer and writer for this part of the Blog was diagnosed with Cancer in late 2017. Sadly Lawrence passed away on the 4th January 2020 after a two year battle. Lawrence was a knowledgeable individual on a range of military history subjects but especially his main passion the American Civil War.
He is and will be missed by all that knew him and goes on to join The Grandfather of the club Don McIntyre, where ever they are there will be games a plenty.

Trooper on the Tide

The Antivari Convoy 5th October - 8th October 1915.
From "The Balkan Front in the Great War 1914-1917"
By T. Long.
From Boardgame Geeks. 1st edition


From Boardgame Geeks. 2nd edition

From Boardgame Geeks

From Boardgame Geeks

From Boardgame Geeks

From Boardgame Geeks


                  The Battle of Sinope put the Turkish war effort on the back foot. The sinking of the Breslau and the Mesudiye meant there would be no more Black Sea incursions. The Goeben had escaped, but was heavily damaged and it would be many months before it would risked in action again. Also the attempt on cutting the Suez Canal was seen off without much difficulty.

            First Lord of Admiralty Winston Churchill  discounted an attempt on the Straits quoting Nelson "No sailor but a fool puts a ship against a fortress.” Instead he suggested an attack on the soft underbelly of the Central Powers, the Dalmatian Coast. This would support Serbia and show the Russians that Britain was serious about their commitment to them “The Road to Berlin goes through Vienna” Churchill argued in Cabinet. “Knock away Austria, the weak partner and Germany will fall.”
                  This was thought premature but it was agreed that the 29th Division should be sent via the Port of Antivari to support Serbia. If this was successful it would be followed by the French 5e Colonial Division. Both Divisions were of long service regulars with experience in Colonial insurgencies, and though few the Serbian High Command, welcomed any support. If the reinforcements were successful then further operations would planned.
The KUK Navy was also a factor in the strategy. From being an ageing coastal fleet it had been modernized, with an ambitious building scheme starting in 1910. Six Dreadnoughts had been launched as well as three semi Dreadnoughts of the Radetsky Class. Impressed by the teachings of the French Jeunesse Ecole that a torpedo boat could sink a Capital ship, Destroyers, Torpedo Boats and Light Cruisers had been launched as well. The navy was lead by Admiral Augustus Mack, of a distinguished military family. Born in 1878, he had gone to sea young and was one of the few of the KUK Naval officers to see action, albeit on land in the Boxer Rebellion. He was considered young to command a fleet, but the Navy was full of younger sons of the Nobility interested in technology and sons of the middle class seeking quicker promotion than they would get in the Army.
                  The Austrians soon learned of the upcoming operation-through out the War, both sides learnt there were few secrets in the Balkans! A large Fleet was gathered at Valletta consisting of 4 Duncan Class, 2 Queen Class and 2 London class pre-dreadnoughts, 4 Armoured Cruisers as well 4 Battle Cruisers, the glamour ships of the Royal Navy. Faster than the stronger Dreadnoughts, said the admirers. Egg shells armed with hammers said the critics.
                  There were only 6 destroyers, as well as 10 transports. An even larger French fleet assembled at Corfu, Greek protests being ignored. Two powerful Courbet class dreadnoughts, 6 Danton class 3 Liberte class, 2 Condoret class and 2 Republic class pre-dreadnoughts as well 10 armoured cruisers were gathered together, as well as 11 destroyers. The plan for the Allies was that the French would seek battle, and the British would proceed to Antivari. The British battle cruisers will act as a scouting force in coordination with the French, using their superior speed.
                   The Austrian plan was that a picket line of submarines would attack the Allied fleet. The Fleet would be divided, with some of the older Erzherzog class with light ships in support would block any attempt at landing in Antivari. The More modern Ships would seek battle.
On the afternoon of the 5th of October a World first happened: the KUK B7 Naval airship spotted and reported a naval enemy task force to another friendly warship. The 4 Battle Cruisers, HMS New Zealand, Indomitable, Indefatigable and Inflexible with 3 destroyers were spotted heading NNW, 40 miles from Bari. The British fleet responded by another first, by shooting down the airship by a lucky shot.
                   The main Austrian Fleet of 6 dreadnoughts, 3 semi dreadnoughts, 4 light cruisers, 17 destroyers and 16 torpedo boats intercepted the British Battle Cruisers. Boldly the British Battle Cruisers faced their foes for 20 minutes before turning away. A light cruiser and a destroyer leader were sunk and the dreadnought Franz Joseph was roughly handled. The Austrians eventually got the range damaging the Indefatigable, causing her to lag behind her consorts. She was sunk by a torpedo attack, but by then the Kuk fleet had been led into the range of the much larger French fleet.
                   Two columns of 11 Pre-dreadnoughts and Armoured Cruisers, each lead by a Dreadnought and flanked by 11 Destroyers loomed out of the twilight. The battle cruisers retired as the two fleets slugged it out. Though neither side had training for it, both sides refused to break off at night. Mack hoped that his destroyers would prove useful in the attack at close range, but the light craft were not as effective as he hoped. Bravely the light cruisers escorted their smaller ships, and paid the price. All light cruisers were sunk as were seven destroyers and five torpedo boats. That is not to say their efforts were totally fruitless. The dreadnought Courbet was left dead in the water and on fire from torpedo hits and only heroic efforts of her crew saved her. The pre dreadnought Diderot suffered flooding and fire from a torpedo hit. Both ships were in the shipyards for months afterwards. French destroyers were not idle, with the dreadnought Prinz Eugene badly damaged by two torpedo hits. The French armoured cruisers proved their worth by accounting for most of the enemy light craft. A lucky salvo from the Vergiaud sunk the semi dreadnought Franz Ferdinand with a massive explosion, the only capital ship lost by either side all night. The night meant the French could not use all their numbers but both sides was amazed of the amount of damage
Modern ships could both inflict and take. The Kuk fleet broke off the battle before dawn, and Admiral Nathan, a old Breton Sea Dog decide that he needed to re order his battered fleet. The Dreadnought Jean Bart was badly damaged, as well as the Courbet. Five destroyers were also sunk and four pre-dreadnoughts suffered major damage. Five of his armoured cruisers were detailed to escort his damaged ships south, while the rest of the fleet resumed its' search. Admiral Mack daringly divided his fleet with the two undamaged semi dreadnoughts and the dreadnought Viribus Unis and three destroyers going to the aid of the blocking Fleet, and the damaged ships heading back to Pola.
                   The Blocking force had actually avoided any combat, and was on its’ way to Antivari. It consisted of three of the old Erzherzog class of pre dreadnoughts, five destroyers’ two light cruisers and eight torpedo boats. The three remaining battle cruisers leading the main French fleet came across the Austrian Fleet sailing east to re enforce the blocking fleet. The Battle Cruisers came on aggressively, hoping by a lucky shot to slow down one of the enemy ships.
                 The Austrian Fleet, seeing a rerun of the day before, turned north and fled. There was a classic sea chase for two hours with salvos at long range. The French Fleet could not get in range and the battle cruisers traded shots with the Austrians. Both sides took major damage and eventually two of the battle cruisers had to drop out of the chase. Sadly the fire eating Admiral, Sir Gregory Heard had to admit that the New Zealand alone could not catch the enemy fleet, and broke off the chase. No re-enforcements would be coming to the blocking fleet.
                   The British Fleet escorting the transports were on course the only problem being the loss the Armoured Cruiser Defence to what was believed to be a submarine but must have been a mine. The Austrian submarines never saw anything over the three days. When the British Fleet under Sir Thomas Stephen arrived on the 8th they found their way barred by the much smaller Austrian Fleet. The British Fleet had 8 Predreadnoughts, 3 Armoured Cruisers, 3 Destroyers and 10 Transports.
                   Gallantly the Austrian light ships flung themselves at the British escorts and the old Austrian capital ships attacked their counterparts. But the odds were too heavy. Both light cruisers were sunk as were four destroyers and four torpedo boats. One Transport holding the divisions’ artillery was sunk, as was a destroyer. The Predreadnought Russel suffered significant damage, and the Duncan and Cornwallis both suffered slight damage. But after two hours, the three old Austrian Capital ships were sunk, and the surviving light ships escaped.
                   Lacking light ships to pursue, Admiral Stephen preceded in triumph to Antivari. Thus an Allied victory was celebrated when one was needed at this stage of the war. The Austrians lost four capital ships to two Allied, six light cruisers, twelve destroyers and ten torpedo boats. Several French ships were in Dry dock for months, as were the three damaged Battle cruisers. To his surprise Admiral Mack and the fleet became popular heroes. Showing a surprising energy and vigour, the capital ships were repaired and using the steel from the old laid up ships the light ships were replaced over a year. But it was not for another year (9 July 1916 Battle of Peligosa) that Capital Ships came out again.
That did not mean the naval war was over. The Austrian Submarine Branch developed into a force that inflicted some stinging blows, bold raids by the Light Craft kept Allied Navies on alert, and a lack of allied Light Craft till 1916 kept the Allies on the defensive. But never again were the KUK fleet in the position to challenge Allied Convoys to the Serbian Front-harass and annoy certainly.
                   The Battle of Antivari was one the Kuk Navy had to win. It failed. Nor was the Austrian navy present at the Storming of Cattaro by the British Imperial and French forces on the 25th April 1915. By keeping Serbia in the war, keeping Bulgaria neutral the Antivari Ferry, as the Royal Navy called it, was vital.
                   The Danube Offensive in July 1916 and its advances along with the successful Brusilov Offensive in June of 1916 were blows the Austrians could barely stand.
Kaiser Karl’s speech from the Throne on the 25th October 1916 pleading for loyalty and offering concessions was showing that cracks in the Empire could no longer be ignored. Admiral Mack and his Naval Column were among the last defenders of the throne in Vienna, and while the Army broke up, the Navy remained Kaiser true, till the Kaisers abdication on the 5th April. The Antivari convoy was a vital link in the chain of events that lead to the end of the Empire, and the Defeat of Germany.

Sunday 28 August 2016

War Lords of Europe (August 2016)


Unfortunately there will be no AAR with this months photos.
Mr AAR, Lawrence, was not able to make the August meeting.
It was an impressive looking


Tuesday 12 July 2016

Britannia (June)


1986

"Chronicles of Britannia”

It has pleased Almighty God to inspire Abbot Steven of St Thomas's Monastery, close by Seidler House that A Chronicle of the Kings and Conquests of Britain since the time of the Romans be compiled. I, Brother Lawrence, head of the Scriptorium have therefore undertaken this great task.  I have asked other monasteries to send copies or at least Summaries of their histories of Britain.  I have tried to work out what has happened, but it not been easy.  Some stories contradict each other; some are vague or unclear as to details.  Still, trusting in St Jerome, the Saint of Scholars to intercede on my behalf and before God to grant me wisdom, in fulfilling this great and noble task.
In Gaul
In Britain


In about the 45th year of the Incarnation, Roman forces of at least Four Legions invaded Southern Britain.  They were led by the Emperor Claudius, in hope of gaining military glory, and conquests.  In Wessex, Sussex, Mercia and the Lowlands, the Belgae submitted, some gladly some not.  But in Essex, there were heavy casualties on both sides, with the Romans repulsed there.  This spurred the Romans to further advances as far as York, where the fierce Brigante clashed with Rome.  There after almost ten years after the Roman invasion King Nathan of the Belgae submitted to Rome.  
The Brigante also attacked the peaceful Welshman and shortly after stormed York.  Inspired by this the Belgae of Norfolk rose against the Romans under their Red headed Queen Boadicea.  She led her forces against the Romans, defeating and driving them back.  The Brigante promised her aid, but decided the Roman forts in Mercia were too strong to attack!  Instead they attacked their northern neighbours the Picts at Dunedin.  After much fighting Brigante retreated, and both the Picts and Brigante decided "It is not good for matched hounds to fight" so concluded a peace between each other.  
Pictish Kingdoms

By the 60th year of the Incarnation,
Queen of the Iceni Boudicca
Boadicea had died and her eldest daughter Sia now ruled.  She made peace with Rome by offering tribute, but paid no taxes, and let but few Romans live in Norfolk.  When the Romans attempted to invade, Sia lead them to the Marsh Country and then attacked, destroying the IX Legion.  There after, a boundary was made, and peaceful trade replaced hard blows.  From time to time Sia and all those who succeeded her would send gifts of gold and slaves to Rome as presents to the Emperor.

Romans attacked and beat the Welsh at Hwice and Avalon.  The Romans fell back and also fought with the Brigante as the Province of March changed hands twice, finally going to the Brigante after they won a great victory over the Welsh.  Thus matters stood in Britain in about the year 100 since the Incarnation.


Small bands of Irish raiders attacked the Welsh, plundering and kidnapping.  The rich would be ransomed and the poor enslaved.  The Irish did make a major attack on the Welsh at Cornwell, with twenty keels carrying fifty Warriors each.  That day there was a feast for the seagulls and ravens, for only five keels were needed to take back the raiders to Ireland.
The Romans fought the Welsh at Hwice, and clashed with the Brigante in Cheshire.  There was a major siege of York which was raised by the Romans with much slaughter among the people of The Blue War Shield.

Then for a long time, peace reigned, with trade replacing war among the Peoples of Britain.  A man could sow and reap a crop, and live to hand on his steading to his sons.
But at about 250 years since the Incarnation, fierce pagans from across the bitter sea attacked the East Coast of Britain.
The Scots from across the North Irish Sea came raiding as well.  But rather unite against these threats Roman and Briton fought against each other!  The Romans and Brigante fought fierce battles in Mercia, both loosing more Warriors than they could afford.  The Welsh retook Hwice and burned the Roman Citadel.  The Irish successfully invaded the land of the Welsh, taking the Province of Dyad.  Seeing the Romans weakened, the heirs of Boadicea attacked and took Suffolk.  But alas for them, they were overwhelmed by attacks from the sea by the Angles!  The people of the Ash tree Lances captured Norfolk and put the Belgae to flight.  But the Saxons were not successful in their attempts to get a foothold in Sussex, as Roman Galleys fought them at Sea.  But there was anarchy, with people leaving the cities for the country side, and warlords setting themselves up and offering protection, but often fighting and plundering each other.
In the 320th year of the Incarnation, the Jutes seized Kent.  How is worth telling in some detail, as Jute and Briton accounts differ.  Both agree that Vortigern offered Jute mercenaries land and treasure to fight against his enemies.  They were successful but then Vortigerns council persuaded him to offer treasure only, not land.  Some Jutes murmured at this, but their leader Lawrentuis said that half a pig was better than no bacon.  The Britons say that Lady Dyonisa pleaded with Vortigern to have a fare well feast, and because of her charm he could refuse her nothing.  The Jutes were invited to a farewell feast before they set sail.  Now Lawrentuis had a sister, some say a daughter, Dyonisa, who travelled with him.  She was as comely as a flower garden in early Spring.  She was slim as a new willow, with dark hair, dark eyes and dark skin. Some said her Mother or Grand Mother came from Afric’s' shores.  An admirer among Vortigerns Guards warned her against attending the feast, for the Jutes would all be slain at the end of it, thus Vortigern would end paying nothing at all.
Jutes (Eudoses)

Lady Dyonisa went hare foot to Lawrentuis, warning him.  Lawrentuis was furious at such treachery, and plotted with his Thegn’s that when Lady Dyonisa toasted "Long Live Vortigern"  The Jutes came prepared with long daggers concealed, to murder their British hosts with great treachery.  Each man was to stab the Briton next to him, and thus repay treachery.  Lady Dyonisa was dallying with the Captain of the Guard, getting him drunk so he would respond quickly to the Jutes Coup. Some say one thing and some another, and I leave it to He Who knows the hearts of men to know what happened.  When this murdering was done the Jutes seized Kent.  Vortigern escaped and died in Wales were his tomb is to be seen.  His son Vortimer raised an army against the Jutes, but was defeated and killed in battle.
Jutes (Eudoses)
In 340 years since The Incarnation the Roman Consul Stephanos Maximus visited Britain. When he toured Britain he saw the task of imposing order he said "Rome should send five Legions, not one Man!"  Maximus had experience with victories on the Danube, and in the Atlas Mountains in Maroochy raised and trained the British as auxiliaries, mostly light infantry and Cavalry.  He left after two years, and alas!  Things did not improve for the Romans.  The Welsh attacked and burnt the Citadel at Avalon, and the Romans were defeated by the Brigante at Cumbrae.  The Romans did turn back a raid from the Jutes into Essex. The Irish continued there invasion of the Welsh, taking the Province of Gwynd.  The Scots were defeated in a raid on the Picts at Strathclyde; also the Angles raided and plundered their neighbours.
In 430 since the Incarnation, the last Regular forces of Rome left Britain, leaving the Roman British Levy to hold back the tide of murder, plunder and rapine!  Truly, April 25 was a dark day, and many weeping lost hope and despaired of Britain.  Now Aelle, leader of the People of the War Axe, called Seax, thus Saxons invaded the East Coast of Britain with a mighty host.  
Northern Mercia fell to them, nor was the Angles in Norfolk spared.  They had to flee for their lives as the Saxons slayed both sexes and any age, without mercy.  The Angles attacked the Brigante at Bernica, the Brigante falling back to the mountains of the Pennines.  The Scots too had a major victory over the Brigante, with the People of the Yellow war shield victors at Strathclyde.  The Caledonians of the Farthest North attacked and were defeated by the Picts in Daladria, a deed that was to bring them much woe.  Thus things in Britain stood, before King Urien, and the Rise of Lord Artos, the Bear.
The Angles

In the 485th year of the Incarnation King Urien of the Brigante rallied his people and attacked the Angles at Bernica.  Great was the slaughter of the bearers of the Ash Wood Lance, and many of the Brigante slaves were freed by the Kings efforts.  He held his lands against Fergus MacMerc king of the Scots as well.  Fergus was a tall man and no man could lift Fergus's sword, so mighty was he.  Fergus was defeated by Urien at Galloway after such a day of battle that Fergus said he had never sees before. For the First time in His life, Fergus ordered the Scots to withdraw. About that time Arthuros, known by many as Lord Artos appeared as a leader of a War band fighting against Britons Invaders.  He was not a King, but would work for those who would support him.  Artos delighted in tricks like a decoy force to fool the Pagans, using Woodsmen to ambush those lying in wait in the Forests, and falling on the Saxons and Angles while they were unprepared for battle.  His enemies decried him as using Stratagems not worth of a warrior, but he would say” The Proof of the Sword is in the Fighting.” He beat in Single Combat a Saxon Champion known for his Hardness and strength the "Rock" or the "Stone” and took his sword, thus taking the sword from the Stone. Artos was his nick name, meaning Bear in the common tongue, for though not tall he was stocky and strong, like a bear. He used big men on big horses as his main striking force and few could stand against him. The Romano Britons reconquered Wessex this way. I asked Brother Thorin why not more could fight this way if it was so successful. Brother Thorin was a man of the Sword before he heard the Call and had much experience in these matters. He said a trained man on horse was worth three trained men on foot, but training man and beast took much time, even years. Also such big horses took much care and were costly to buy. The People of the War Axe fell on upon the Jutes of Kent, but the Saxons were defeated.  They had more success against the Belgae in Suffolk and took over that unhappy province.  The Picts attacked the Caledonians with great fury, slaying the entire all they encountered in the Orkneys.  The Caledonians repulsed them in the Hebrides Islands.


Saturday 2 April 2016

Games of Thrones & The Road to Cheren 1941 (Feb 2016)

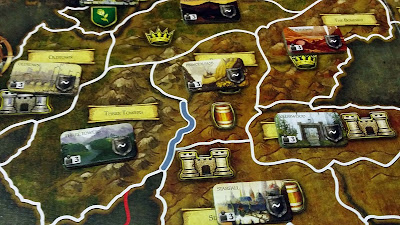
A Game of Thrones: The Board Game


Winter is Coming


-----------------------------------------------------------------------------------------------------------------------

The Road to Cheren (2013)


Revolution Games (II)


The Italian conquest of Abyssinia

"Purnels One Volume
History of WWII Excerpt from Chapter III
"Star of Africa".
Lorenzo, Duke of Aosta and defender of the East African Italian Empire had served as a competent if uninspired Staff Officer in WWI and Spain. He was better known as an administrator and maker of long speeches than a fighter.
The Duke of Aosta’s, British opponent was Major-General Steve Thomas, was a man made of a very different metal to the Italian Duke.
Major-General Thomas was by trade an Accountant, he had been a member of the Artists' Rifles when the First World War had began. By the end of the WWI he was Britain’s' youngest Brigadier, winner of the DSO and Bar. He had served in Flanders, Palestine, and led "Thomas Force" in The Russian Civil War. Major-General Thomas had prospered in civilian life between the wars, then when a second world war broke out, Mr Thomas was recalled to the army in his former rank. 
Major-General Thomas helped plan in 1940 the defeat of the Italian Army in Libya with "Operation Compass” and he also command the British troops in the operations final stages.
Now Major-General Thomas was given his first important command, the conquest of Italian East Africa. Major-General Thomas had five strong regular Indian Army Divisions as well as a strong Free French Brigade. The air support was strong, and the Royal Navy had the Italian East African Fleet blockaded for some time.
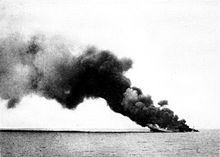
Italian ship Ramb I sinking, 1941


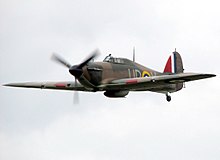
RAF Hurricane


The Italian armed forces was by contrast small, about a third of the size of the Allied forces, with only two regular battalions among them. Some of the Italian forces was made up local raised units, of doubtful loyalty to Il Duce.  Many of the Colonial Brigades were under strength, and spare parts for artillery and aircraft were in short supply.


Italian SM-79 Bombers

Britain had agents of 101 Force already in country to stir up trouble for the Italians among their new subjects, But the Italian position was very strong, if undermanned, with rocky mountainous terrain, and unless the British could over whelm their adversaries by early June then rain would turn the roads into mud and every valley a river. Duke Aosta had a good staff of veterans from both WWI and Spain and wisely relied on their judgement.
Later than he had hoped Major-General Thomas forces crossed the Northern border on 19/1/40.There was fighting at the border town of Kassola, and at the Casi River Bridge. The common scene of the Campaign had begun-the Italians would hold defensive ground as long as they could, and then retreat. Time and again British armoured thrusts would just miss the Italians. Though low on ammunition the Italian artillery was as good as ever in support. British air gradually came to dominate the skies, but when the Italians finally conceded the low ground and went into the mountains, there was only so much they could do.
By early March the British were on the road to Cheren and Asmara, their main goals. In the mountains however the Italians reverted to old fashioned trench warfare from prepared positions on mountain sides. The British needed every man they had to slowly grind their way forward. A native uprising lead by the famous South African explorer and butterfly collector Doctor Gabriel Singer flared up at the vital Italian crossroad town of Adwigre, cutting the Italian position in two. The uprising was ruthlessly put down by two Colonial Brigades, and Doctor Singer was shot as a spy (he was later awarded the George Cross, by the British Home Office).

Ethiopian fighters await the return of the Emperor

The Free French were only days away from Cheren on the 30th of May when the rains finally broke bringing operations to a near complete stand still. Major-General Thomas pulled his troops back from exposed positions, still keeping up a strong presence in the mountains, at the same time the general recognised that he would have to wait for months to finish off the Italians.
Fighting began again in October, this time a mostly Free French Corps backed by New Zealanders and lead by General Le Clerc was leading the attack.

The Italians low on ammunition and their position hopeless the Duke of Aosta capitulated on Armistice Day 1940.
General Le Clerc refused to accept the side-arms of "An Honourable foe who has struggled against an impossibility." Not to be out done, the New Zealand General Freyburg asked for the honour of shaking the hand of a man who had done his duty and more. This coming from a Victoria Cross winner, helped soothe the sadness of defeat  Duke of Aosta recorded in his Memoirs  ‘For The Greatness of Italy’.


From the end of 1941 to September 1943, c. 7,000 men in scattered Italian units fought a guerrilla war from the deserts of Eritrea and Somalia to the forests and mountains of Ethiopia.

Major-General Thomas had been transferred and been given a new post as Chief of Staff, Malaysia (See Chapter VII "Asian Avalanche-The Fate of Malaysia, Singapore, The Philippines and the Dutch East Indies"). The Duke of Aosta was transferred to a comfortable cattle station in Australia. After Italy became a Republic Aosta returned to Australia became naturalized and had a political career of some success. Major-General Thomas escaped from Singapore and wrote a vitriolic but accurate report on the fall of Singapore, which was not made public until 1993. He served as chief of Staff to the Fifth "the Forgotten Army" Army earning the title of "Slims" Right Hand".

Italian Armoured Car under repair near Cheren


South African troops at Fort Hobok 1941


The German Motorized Company


British artillery at Cheren


British Wellesley Bomber on it way to bomb Cheren